Your cart is currently empty!

The Ultimate Guide to Setting Short Bond Paper Size in Microsoft Word
Microsoft Word is an indispensable tool for creating and editing documents. One aspect that can be a little perplexing is setting your page size to meet specific printing standards and requirements. This guide will explain what short bond paper size is and present a comprehensive tutorial on how to set this size in Microsoft Word. Plus, we’ll delve into other options, such as margin setting, header and footer formatting, and much more.
What is Short Bond Paper Size?
Short bond paper is commonly used in offices, schools, and businesses around the world for everyday printing, copying, and documentation tasks. It measures 8.5 by 11 inches or approximately 21.6 x 27.9 centimeters. More widely known as the “Letter” size, this paper is often the default size setting in printers, word processors, and other office-related equipment.

Preparing Your Microsoft Word Document
Before we dive into how to set your paper size, let’s first explore some basics of Microsoft Word.
Default Microsoft Word View
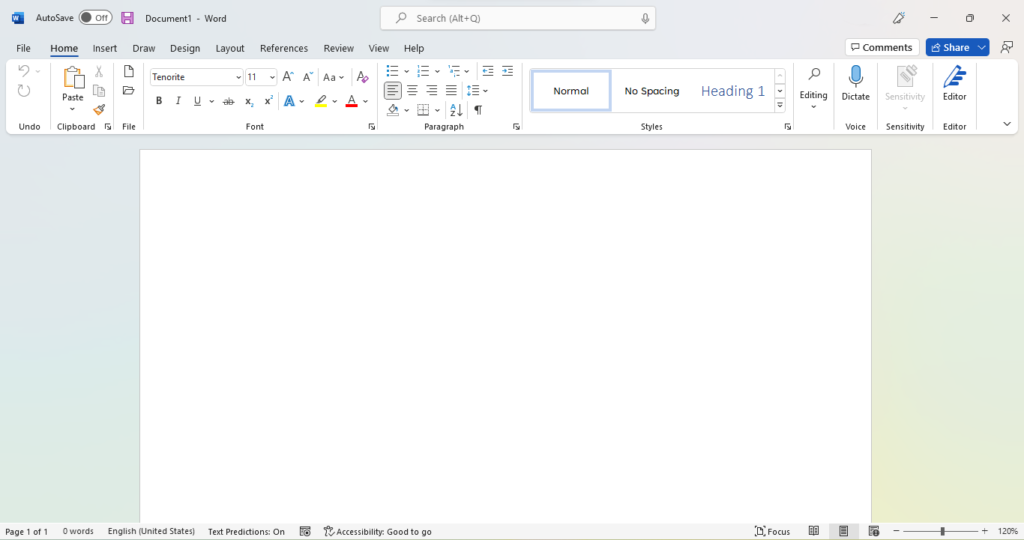
Upon opening Microsoft Word, you typically access the default view, which displays the paper size as set by the software. By default, the software’s page setup matches the most common paper size in your region. For instance, in the United States and the Philippines, the default size is typically the Letter or short bond paper size.
Setting Your Page Layout
For a comprehensive understanding of Microsoft Word and its page layout settings, follow these steps:
- Open Microsoft Word.
- Click either on “Blank Document” to create a new file or open an existing one.
- Observe the default page layout and view.
- Microsoft Word’s “Home” tab typically displays by default.
Next, we’ll go through the page setup procedure, including choosing the short bond paper size.
How to Set Short Bond Paper Size in Microsoft Word
The following is a step-by-step guide to adjusting the page size in Microsoft Word to match short bond paper (8.5″ x 11″).
Using the “Letter” Size Preset (Modern Word Versions)
- Open or create a new document in Microsoft Word.
- Navigate to the “Layout” or “Page Layout” tab, located in the top toolbar.
- Click on the “Size” button within the “Page Setup” group.
- A drop-down menu will appear, displaying a list of preset paper sizes. Choose the “Letter” preset, equivalent to the short bond paper size (8.5″ x 11″).
Manually Adjusting Paper Size (All Word Versions)
- Open a new or existing document in Microsoft Word.
- Click on the “Layout” or “Page Layout” tab.
- Select “Size” or click “More Paper Sizes” in the “Page Setup” group.
- In the “Page Setup” dialog box, type 8.5 inches as the width and 11 inches as the height for short bond paper size.
- Confirm your changes by clicking “OK.”
These steps apply to newer Microsoft Word versions. Older versions, like Word 2011 for Mac, may have varying user interfaces but identical functionality.
Customizing Your Layout with Margin Settings
Adjusting margin settings can further tailor your document formatting. Follow these steps to set your desired margins:
- Open a new or existing document in Microsoft Word.
- Click on the “Layout” or “Page Layout” tab.
- Choose “Margins” within the “Page Setup” group.
- Select a preset margin option or click “Custom Margins” to manually adjust the settings.
- In the “Page Setup” dialog box, set your preferred margins for the top, bottom, left, and right sides.
- Press “OK” to save changes.
It’s important to note that narrow margins can lead to printing issues if your printer doesn’t support borderless printing.
Formatting Headers and Footers
Adding headers and footers to your document can improve its presentation and professionalism. Follow these steps to create and customize headers and footers:
- Open a new or existing Word document.
- Click on the “Insert” tab in the top toolbar.
- Choose “Header” or “Footer” from their respective groups.
- Select a built-in header or footer template or click “Edit Header” or “Edit Footer” for customization.
- Type your desired header or footer content.
- Format using the built-in “Header & Footer Tools” or via the “Home” tab.
Double-clicking anywhere outside the header or footer area will save your changes and exit the edit mode.
Additional Tips and Tricks
Use Page Breaks for Consistent Formatting
To maintain consistent formatting throughout your document, use the “Page Break” feature. This tool separates sections without manually pressing “Enter” multiple times.
- Place your cursor where you want to insert the page break.
- Click on the “Insert” tab in the top toolbar.
- Choose “Page Break” within the “Pages” group.
Saving Your Document
Remember to save your file frequently to avoid losing progress. Press “Ctrl + S” on your keyboard or navigate to “File” > “Save As” to designate a folder and file format.
Conclusion
Understanding Microsoft Word’s document formatting options, particularly setting your page size to short bond paper (8.5″ x 11″), is essential for effective document preparation and presentation. This guide provided an in-depth look at the various settings that affect document layout, from paper size and margins to headers and footers. Mastering these techniques can significantly improve your Microsoft Word experience and ensure your documents are visually appealing and ready for printing.
Now that you have a comprehensive understanding of setting short bond paper size in Microsoft Word, you’re better equipped to tackle any document creation tasks that come your way. Happy word processing!
Leave a Reply